God has a sense of humor. I'm fairly certain that's why he gave me, a fashionably-challenged woman, a little girl who believes Fancy Nancy looks a bit plain. While I tend to choose browns and other safe colors, she matches red and pink polka dots with rainbow stripes, then somehow manages to pull it all off adorably.
She was three when one day I had mentioned she was outgrowing her shoes and would need new. With a serious look on her face, she replied, “Yes, and I will need tennis shoes for playing outside, sandals for summer, flip flops for the pool, shiny shoes for dresses, boots for winter, sparkly shoes for when we go places, slippers for bedtime, water shoes for the spray parks…” And she rattled on and on as her list of “must have” shoes grew. That's when I realized that my frugal budget was not going to mesh with her fabulous visions.
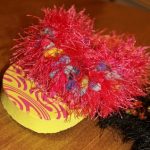
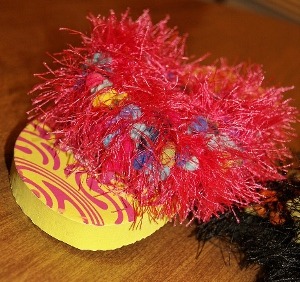
While I may not manage to keep her closet as full as she'd prefer, together we do fill it with flip flops for the summer that never cease to get comments everywhere we go! self! And the best part? She can make them her
What you'll need…
- A Stylish Little Girl
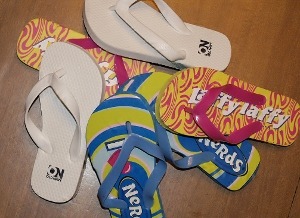
- A Pair of Plain Flip Flops
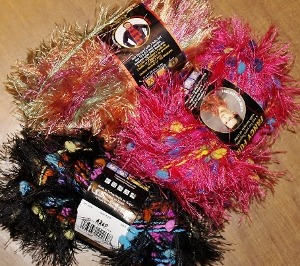
- Funky, Fun Yarn
- Scissors
How to save…
- Flip Flops: You can often find flip flops for $1 at Walmart and in the Target Dollar Spot. You can also get them for $1 during Old Navy's $1 Flip Flop Sale or for around $2.50 when not on sale. You'll be covering up these flip flops, so it won't really matter how they look.
- Yarn: I purchased the yarn pictured for $1 at Dollar Tree, but you can often find affordable yarn at any dollar-type store. Also check the clearance section at Michael's, Hobby Lobby, and JoAnn's. The funkier the better! One package of yarn will make at least 2 pairs of flip flops, depending on the shoe size.
Final Cost: As low as $1.50 per pair!
How to make them…
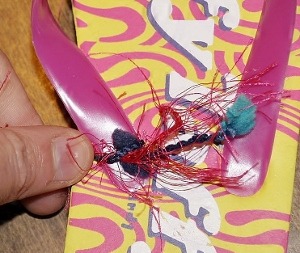
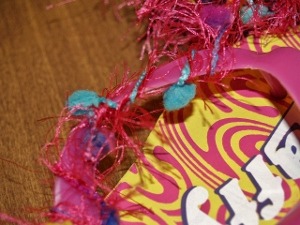
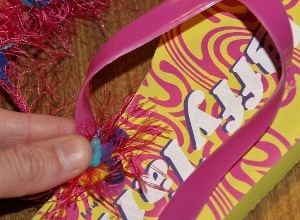
1. Tie the yarn tightly on one end of the flip flop's foot strap. Your child may need help with this, depending on their age. I recommend tying it about 3 times to make sure it is tight and doesn't wiggle loose during play. Trim the yarn's tail after tying, if necessary.
2. Now wrap! Simply wrap the thread around the flip flop's strap in a spiral motion. Your child should be able to do this, but may need help getting started. For my younger daughter, I encourage her to wrap the yarn down the strap, so she can see the spiral. This stops the yarn from getting tangled easily.
3. Every so often, stop and press the spiral of yarn firmly down towards the knot. The tighter you press it down, the more yarn you can fit on the strap and the fuller your final design will be.
4. Continue pressing the yarn together and wrapping until you get to the toe divider.
5. The toe may be tricky for smaller children, so they may need some help. Press the yarn firmly together to make sure you've wrapped as closely to the toe divider as possible and the yarn is tightly wrapped around the foot strap. When you're sure the first side is done, wrap the yarn on the other side of the toe divider and start down the second side continuing to wrap and press the yarn together. Now, you're pressing the yarn firmly up towards the toe divider.
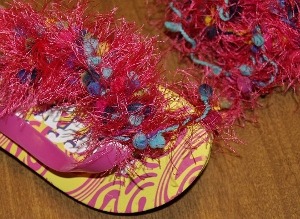
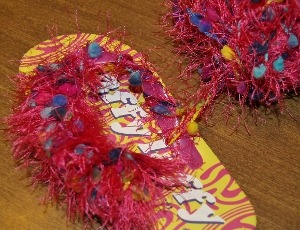
6. When you have fully covered both sides of the foot strap, tie the yarn off on the flip flop. Again, tie it about 3 times to make sure it's nice and tight. You may have to help younger children. Cut off any excess yarn. Then, you're ready to put them on and show off your new trendy footwear.
My daughter gets so many compliments on these simple, but bold flip flops, we often make them as gifts for her friends. They make a very affordable and unique gifts for little girls with frilly fashion taste.
They also are wonderful to donate to hospitals and other causes. Nothing brightens up a hospital gown more than hot pink, fuzzy flip flops for trips across the always cold hospital floor.
You can also personalize flip flops with ribbon, bows, fuzz balls, beads, rhinestones, feathers, cloth scraps, buttons, fringe, glitter, and other fun accessories, along with a hot glue gun. For younger kids, you can find Flip Flop Glue or other sturdy glues to replace the hot glue gun.
Get creative and more importantly, have fun!
After leaving the never-sleeping world of market research, to enter the never-sleeping world of stay-at-home mom, Beth found herself trying to manage on one income and a new very tight budget. She found ways to save, so they could splurge on little luxuries. Now, at In Good Cents, she helps families learn to save money on necessities, so they can enjoy the finer things too. She lives with her husband, three young children, and three huge dogs (yes, she's a bit nuts) in Indiana.



 →
→
Thanks, Stacy, for the opportunity. And, now I’m off to read your post!
Thanks so much for the step by step tutorial and the suggestion about donating to a children’s hospital. That would be an excellent craft idea for a girl scout troop, or for community service hours. In fact, it might be worth checking with a children’s hospital to see if you could do this craft activity with the kids in the hospital who might be bored during the day.
If you have an idea already of what brand and model to purchase online, then checking this product
out through reviews is still useful. So, one needs to
make sure that they are choosing the shaver that can shave with maximum performance with little
effort. (You any wash your face first with a shaving wash and put pre-shaving lotion or cream if you want to.